Presenting with Laptops
Presenting with "Join Through Browser"
Note: This feature is only available on newer hardware. If you don't see instructions for this feature on your display's splash screen, please follow the instructions to install the application in the section below.
To Connect:
- In a Chromium-based browser (ie: Google Chrome, Mozilla Firefox, etc.), navigate to the "room name URL" provided on the screen in the classroom (ex: cabellb35e.wp.vcu.edu). You should see a blue screen with "Join Through Browser" in the center.
- Select the "Join Through Browser" option.
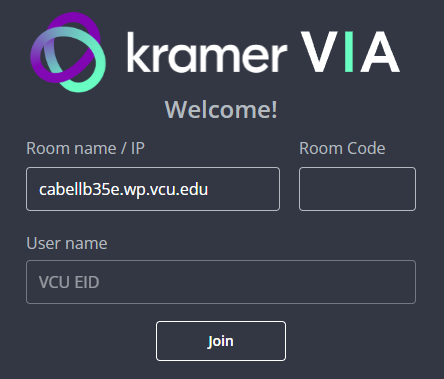
- After selecting "Join through Browser", the next screen will look like the image below, with the "room name" field automatically populated.
- Provide a username such as your VCU eID then click "join".
- When the room code prompt appears, enter the 4-digit code provided under the room name on the splash screen display.
- Click "join" to connect.

To Present:
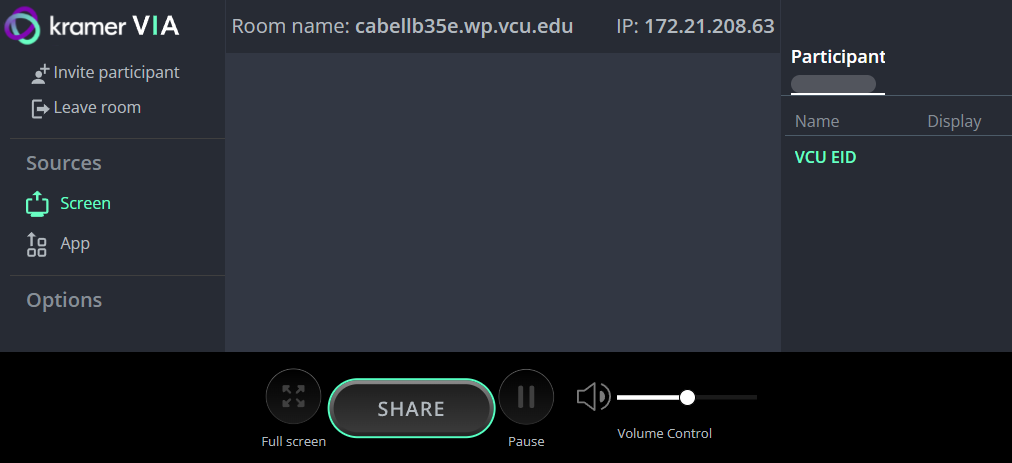
- After you have successfully logged in, a new screen will display features listed on the left and participants listed to the right.
- When ready to begin presenting, click on the green "share" button in the bottom-center of the screen.
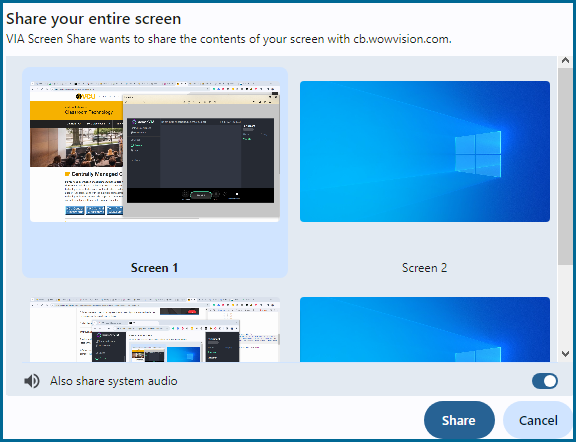
- Select the content you want to present from the available options.
If Audio is associated with your content, be sure to click the "also share system audio" button on the lower right side of the screen. - Click "share".
Note: While presenting, you can pause your presentation by clicking the "pause" button.
To Stop Presenting: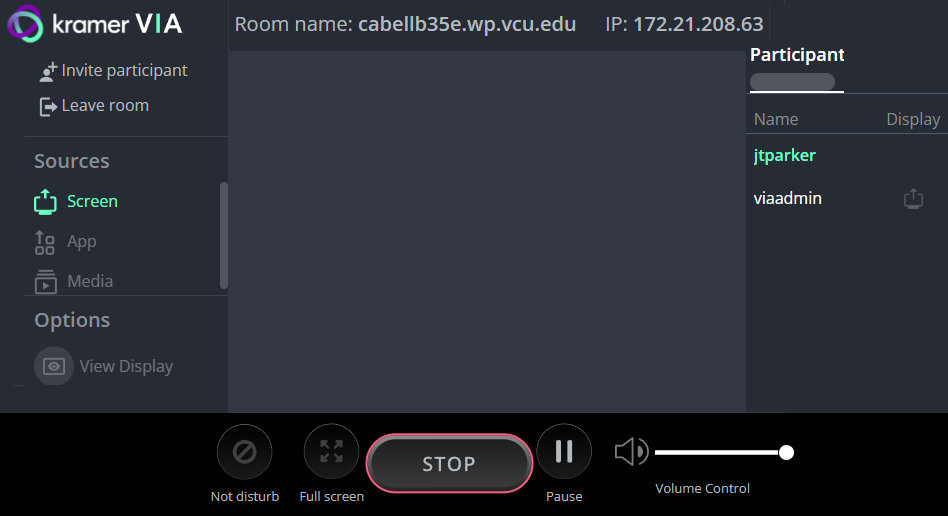
- Stop presenting by clicking the red "stop" button.
- Once you have finished using the application, be sure to log out of the session by clicking on the "leave room" button in the upper left corner of the screen; or close the browser window.
VIA Application Download
![]()
IMPORTANT UPDATE: Only use version 4.0 or later. If you have version 3.3 on your device, you'll need to uninstall it and replace it with 4.0 or later.
University-Owned Devices
Windows Users:
- Option 1: Open "Software Center" (Windows)
- Option 2: Request that the VIA app be added to your device by your system administrator.
Mac OS Users:
Contact your system administrator to install the application through Self-Service because there are some settings that require a device admin account to apply.
Personal Devices
- Windows users:
Visit the manufacturer's resource page for the Kramer VIA Connect 2 and download the latest "VIA Setup Windows client (exe)." - MacOS users: visit the manufacturer's resource page for the Kramer VIA Connect 2 and download the latest "VIA Setup MAC client (.dmg)."
Presenting with the VIA Application
NOTE: The VIA Application is only available for download on Windows and MacOS machines. Chromebook and Linux users should present from a Chrome-based browser.
TO PRESENT: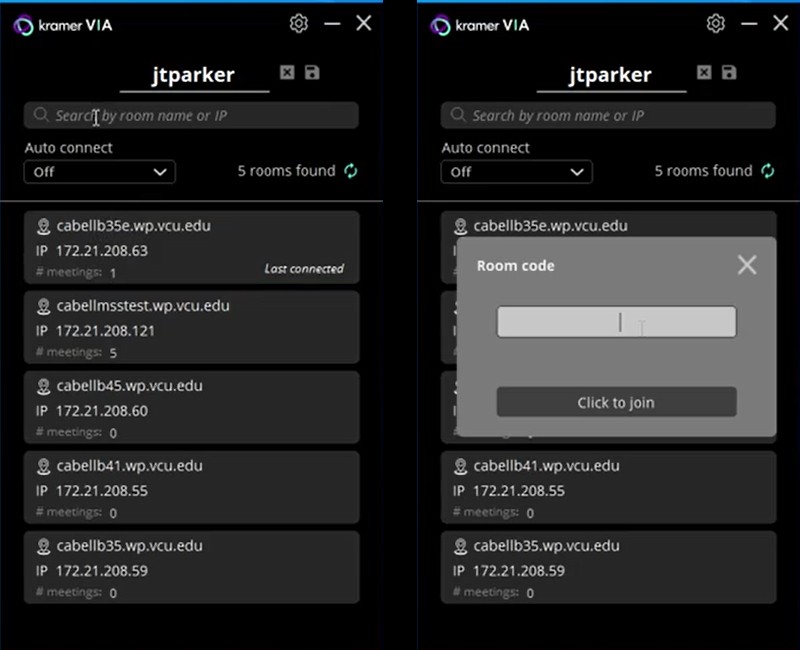
- Open the VIA App.
- Either Select your room's device from the available list of devices or type in the "Room Name" found on the splash screen of the wireless presentation device in your room.
- Enter the "Room Code" when prompted.
- After you have successfully logged in, a new menu will appear.
- If your computer has more than one display, select which display
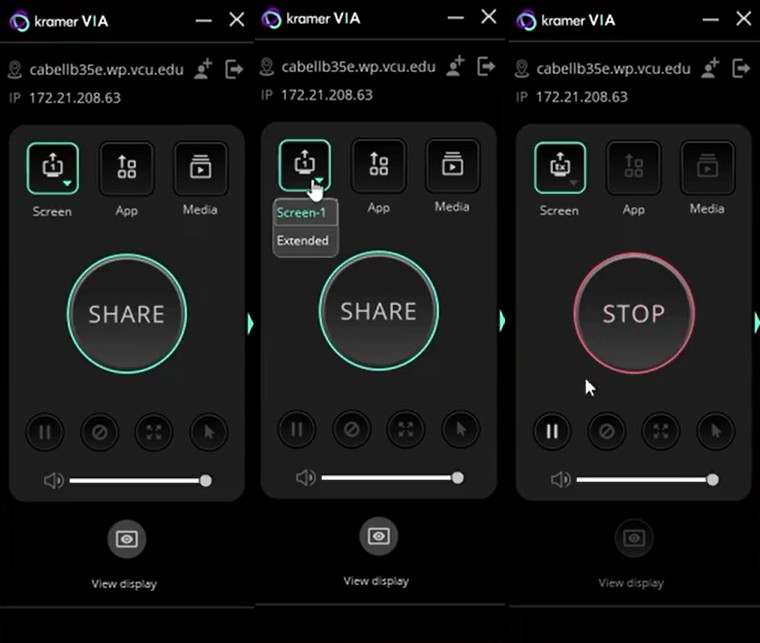 you want to present before you click present.
- If your computer has more than one display, select which display
- Click on the present button in the center of the menu to wirelessly present your device’s main display.
- While presenting, you can:
- Pause your presentation by clicking the pause button.
- Prevent another user from presenting by clicking the do not disturb button.
- Stop Presenting:
- Click the center stop presenting button.
- Once you have finished using the application, close the app by clicking the “X” in the top right corner of the menu.
Known Limitations of the VIA Application
Video Playback - While technically possible with PCs or MacOS, wirelessly presenting video and audio content may have a significant delay or sync issues, or in some cases, will not work. The causes for this range from wireless bandwidth to operating system incompatibilities. If high-quality video/audio is required for presentation, it is recommended that you use an HDMI Cable.
MacOS - Please note that in order to share Audio and/or extended desktop, you will be prompted to install additional drivers for each of these capabilities the first time you attempt to use them. Each of these will also require an admin level access to your device to enable.