Advanced Zoom Classrooms
Advanced Zoom classrooms allow all of the same functionality as the standard Zoom classrooms with the added capability of room cameras. If there is only one camera in the room, it faces the podium for the presenter. If there are two or more, the additional cameras are classroom-facing. In some advanced Zoom classrooms, there are also microphones available for student interaction. These microphones are enabled from the podium control panel.
Advanced Zoom Configuration
These central classrooms are configured for advanced Zoom use. Use the links below to view a full list of technology found in these spaces.
Camera designations: All systems in the list below have at least one camera facing the presenter. If there is no camera designation, then there are at least two cameras - one for the presenter and one for students.
+ Instructor camera only
Microphone Designations: All systems have a minimum of the podium microphone available. No Microphone designation means only instructor microphones are available in the room.
** Student Tabletop Microphones
| MCV Campus | ||
|
Egyptian Building College of Health Professions |
Kontos Medical Sciences Lyons Building Health Sciences Research Building Molecular Medicine Research Building One Capital Square |
Sadie Heath Cabaniss Hall Sanger Hall Smith Building W. Baxter Perkinson, Jr Building |
| Monroe Park Campus | |||
|
Harris Hall |
Hibbs Hall |
Academic Learning Commons Oliver Hall Education Wing |
Oliver Hall Physical Sciences Wing T. Edward Temple Building Trani Center for Life Sciences |

Podium Microphone
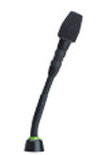
Located on top of the podium near the control panel, this small but powerful microphone will pick up the presenter's spoken content from anywhere behind the podium.
Podium Computer
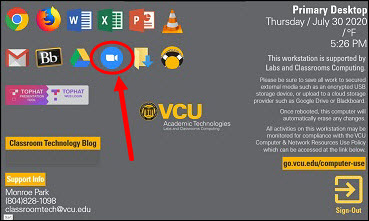
Located within the classroom podium's equipment rack, the computer is preloaded with the zoom software. After logging into the computer with your E-ID, simply click on the Zoom Icon on the desktop.
Document Camera
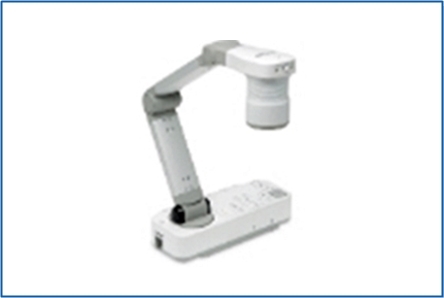
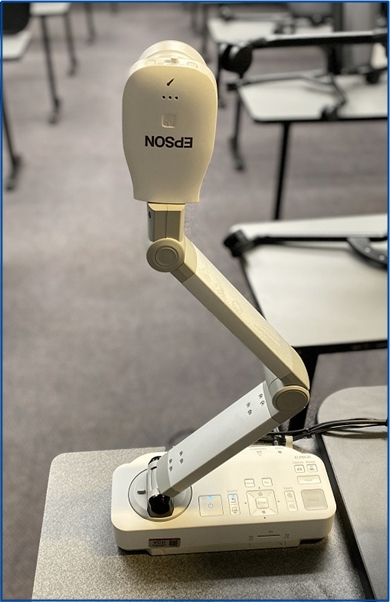
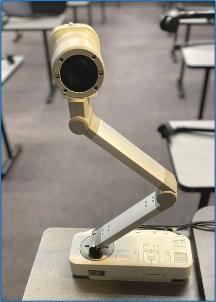
Found on the side of the classroom podium, the document camera gives users the ability to share written notes and other visual aids with the zoom call.
Room Speakers
The system Room Speakers are located throughout the room. The volume level slider that controls the volume for the computer into the classroom is located on the right side of the podium control panel.
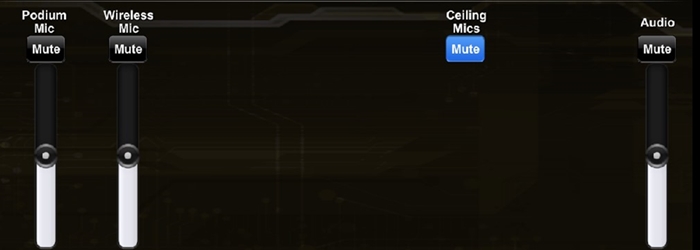
Student Microphones (Limited Availability)
Some locations, mostly on the MCV Campus, there are also Student microphones available for class participants to be heard. These can be controlled on the podium control panel, audio page. For a full list of where these are available, Look for the "CSM" (Ceiling Student Microphone) or "TSM" (Tabletop Student Microphone) designation in the Advanced Zoom classroom list.
Wireless Microphone Receiver (Limited Availability)
In our larger lecture hall spaces, the system contains a wireless microphone receiver that is available to zoom along with the podium microphone. Wireless microphones may be checked out from the IT Support Center. Note: There is a very limited number of these microphones available for checkout. Please contact the IT Support Center at 828-2227 to inquire about availability.
Testing Speaker and Microphones
There is a very quick and simple test that we recommend you run before you start your zoom calls to make sure everything works properly for your class. The computer should recognize and set default devices automatically, but it is easy to verify.
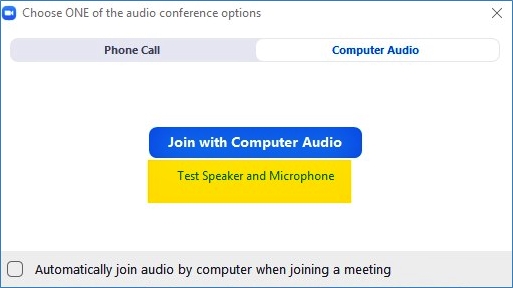
- After starting or joining a meeting, click on "Test Speaker and Microphone" (highlighted in yellow below)
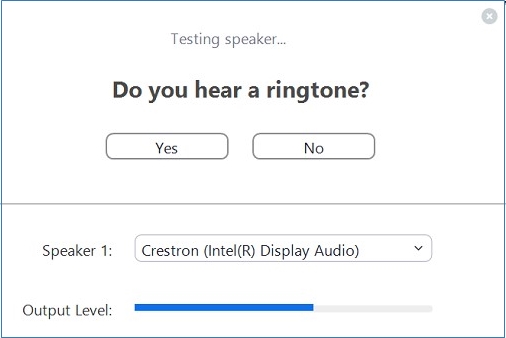
- You should hear a series of prompts to confirm you can hear and be heard.
- If you do not hear the prompts, verify that the volume control on the podium is up and unmuted.
- If you still do not hear the prompts, click on the dropdown list available on the menu.
- Once you hear the ringtone, click "Yes" then follow the prompts to verify your microphone is properly selected.
Menu Icons
 The audio and video menu icons will look like the ones pictured to the left. To access the menus, click on the caret at the top right of each icon.
Audio Menu Default Settings
While we try and maintain a standard user experience for our AV systems, some individual components get updated as models retire and are replaced. As a result, depending on your classroom, you may see different Microphone options available to you. The computer should set to the appropriate default for you, but if you experience an issue in your room, please chose the device in your room that you see in the list below. In most cases, there is only one options available to you. If you have more than one, please select "Echo Cancel Speakerphone TesiraFORTE."
Select a Microphone
- Echo Cancel Speakerphone (TesiraFORTE)
- Echo Cancelling Speakerphone (AV Bridge Matrix PRO)
- AV Bridge
- AV Bridge Conference
- Microphone (Shure Digital )
- Do Not Choose for microphone EPSON ELPDC21 unless there are no other options available.

Select a Speaker
- Crestron (Intel(R) Display Audio)
- Do not choose "Speaker (2-Shure Digital) if available
Video Menu Default Settings
If you are having issues with seeing the camera, please verify one of these devices is selected.
Select a Camera
- AV Bridge Matrix PRO
- AV Bridge
- AV Bridge Conference
- Quick-Connect USB
- EPSON ELPDC21
- The document camera needs to be powered on to be seen by the computer.
- For more information about the document camera, please visit our Document Camera page.

Select As The Primary Camera
Especially helpful in systems without room cameras, the document camera feed will be the camera content rather than having no video feed at all.
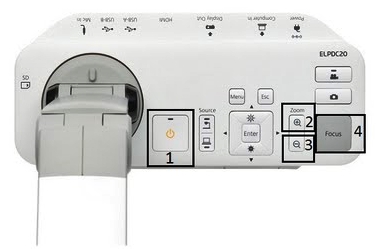
First, ensure the document camera is powered on, using the power button (1).

Click on the caret located to the right of the stop/start video button to access the camera menu.

Select EPSON-ELPDC21 from the available camera list.
Disable "Mirror My Video"
For most users, “Mirror My Video” is a setting people leave on, so when you look at your webcam view of yourself it looks like you’re looking in a mirror. But if you use the document camera for written text, it will not look right. By going into the video settings of Zoom, you can uncheck “Mirror my video” and the content will look like it should.
Open the video settings menu by clicking on the caret beside "Start Video" or "Stop Video".

Select "Video Settings"
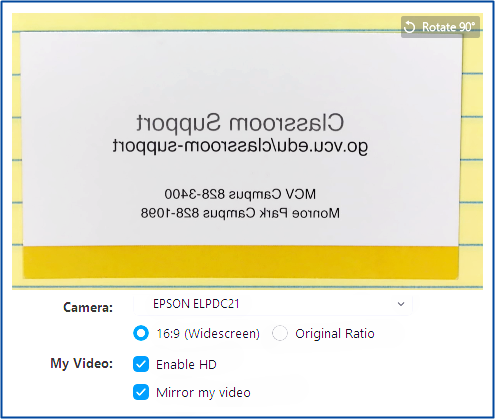
You'll find a screen that looks similar to this. Note the text is mirrored.
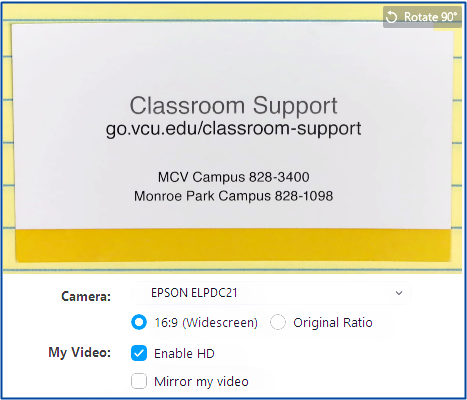
Uncheck "Mirror my video". This should make the text read left to right in your preview window.
Close the video settings window.
* These settings should retain for the semester within your profile after you set it in each classroom. The next time you use the same classroom as long and the computer has not had to be replaced or reimaged you should not have to redo these steps.
Select As A Secondary Camera
In spaces where there is a room camera to use as the primary camera, sometimes you may want to share the content from your document camera and still see the room camera at the same time.

First, ensure the document camera is powered on, using the power button (1).

Click on Share Screen
Click on "Advanced" at the top of the menu.

<p
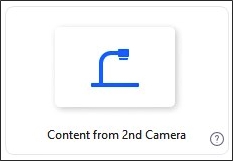
Click on "Content from 2nd Camera".
 If you don't see the document camera, click the Switch Camera Button in the upper left corner of the screen.
Use As Room Camera
While the document camera is first and foremost designed to be used to capture content found located on the podium surface under the camera, it is possible to use it as a manual room camera with a few minor adjustments.

First, ensure the document camera is powered on, using the power button (1).

In zoom, click on the Video menu arrow and select "video settings..."
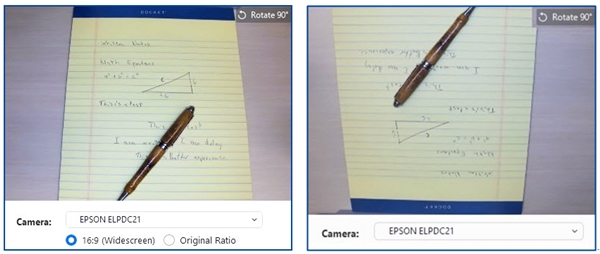 In the preview window of the video settings menu, there is a "rotate 90 degrees" button. Click it twice to rotate the image 180 degrees. This will make the image appear right side up when using the document camera as a room camera.
NOTE: You will need to repeat this process the next time you want to use the document camera for written content under the camera.
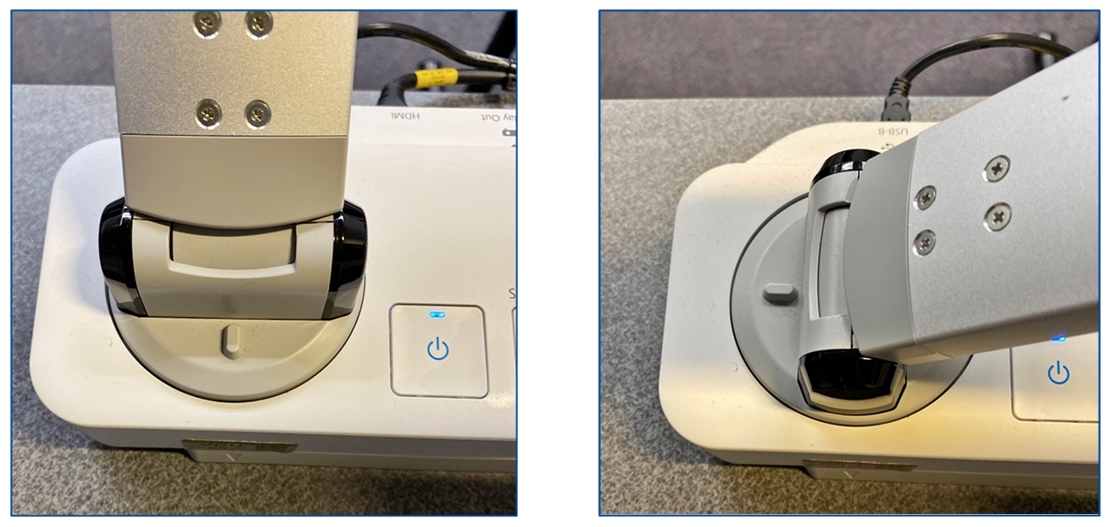
With the Camera arm raised up, turn the camera arm so that the notch at the base of the camera moved from pointing at 6 o'clock to where it points to 9 o'clock.
Disable "Mirror My Video"
For most users, “Mirror My Video” is a setting people leave on, so when you look at your webcam view of yourself it looks like you’re looking in a mirror. But if you use the document camera for written text, it will not look right. By going into the video settings of Zoom, you can uncheck “Mirror my video” and the content will look like it should.

Open the video settings menu by clicking on the caret beside "Start Video" or "Stop Video".

Select "Video Settings"

You'll find a screen that looks similar to this. Note the text is mirrored.

Uncheck "Mirror my video". This should make the text read left to right in your preview window.
Close the video settings window.
* These settings should retain for the semester within your profile after you set it in each classroom. The next time you use the same classroom as long and the computer has not had to be replaced or reimaged you should not have to redo these steps.
Document Camera Desktop Application
We have applied a shortcut to a document camera application on the desktop of the computer for the use case where faculty will need to use the document camera as an application rather than a camera source within Zoom.
Pros:
- Allows the user to open the document camera video as an application window on the computer for easy navigation to and from it and other applications during a presentation. This simplifies the user experience in zoom because the presenter only has to "Share" their entire desktop once and whatever application is showing (internet browser, PowerPoint, or document camera) will show to the classroom on the projector as well as the remote participants via Zoom.
Cons:
- While we are working on rectifying this, currently the application is a chrome extension and needs to be "installed" every time Chrome is closed and reopened. This takes about 5 seconds.
- During a zoom call, the "Shared" content has a one frame per second refresh rate. That means the flow of writing on a paper tablet will look choppy to the remote viewers, but the content, once written will show up clearly.
How to use the Document Camera Application

First, ensure the document camera is powered on, using the power button (1).
![]()
Click on the document camera icon on the desktop.
 Once the chrome Browser opens, if you see the "add to chrome" button, wait about 5 seconds for the "Launch app" (below) button to replace it.

Click "Launch app"

After a few seconds, the application will open. Verify the document camera "Epson ELPDC21" is selected by clicking on the Camera Icon located at the top left of the screen.
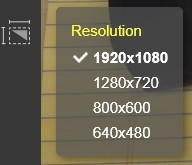
For best image quality, click on the "Resolution" icon and select 1920x1080.
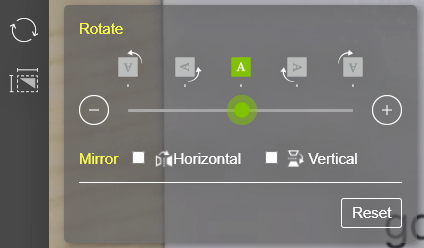
If your video feed looks mirrored (words don't look right), make sure the rotation settings match what is listed here.
For more Information about using Zoom, visit go.vcu.edu/zoom.
Possible topics of interest: